There are already some great posts on this blog about Team Projects and I encourage you to read through them by clicking on the category: Team Projects. What I want to do in this post is to summarize some of the key points made in the webinar: Using Canvas to Facilitate Team Projects which can be found under Faculty Resources.
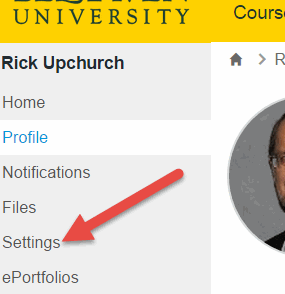
Canvas has a rich environment for project teams, which they label “groups.” Be fore getting started, however, I highly recommend going to your personal settings within Canvas and take care of two tasks: First, make sure you have uploaded a picture and bio. Students should expect their
  Instructors to have completed this task and they can read through this information, enhancing your credibility. Second, go to settings and “Register” your Google Drive (gmail) account. This does not give Canvas access to your Google Drive documents, but it does facilitate your ability to set up collaborations with your students. Students should also be encouraged to register their Google Drive so that they can access the collaboration features available in Canvas.
Now that you have taken care of these housekeeping items. Here is a general checklist which will get you started in using Canvas to facilitate team projects. Let me strongly suggest you also watch the webinar as well for greater details.
- Under the People navigation link, click on +Group Set and give it a name. Group Sets are basically types of groups, e.g. Project Teams. Think about the options listed there before you click on save. There are good reasons to choose one option or another and the video will help with that. If you don’t start the groups, then they will not be available to students. YOU ARE KEY TO MAKING THIS WORK.
- If you chose to set up the groups manually, give each group its own name
 . You can set up as many groups as you like. Once the group is set up you can manually drag members into the groups or use the + by their name to select the group where you would like them. Setting up a group leader is as easy as clicking on the gear icon by a name and selecting “set as group leader.” This is usually a good idea as it gives the group better autonomy to move around within the site.
 - Once the groups are set up you can access the group’s page by clicking on the gear icon by the group name and selecting View Group Home Page. From here group members can post announcements, start discussions, store files, start collaborations, and conferences
- Conferences can be created and left open ended, but remember to click on Start so the groups have access. This allows them to set up regular meeting times which you can join to see how they are progressing. Please consult the webinar video for more details.
- Collaborations make use of Google docs, which is why you need to register your Google Drive. The Instructor should start one shared document within each group. This allows you, as owner of the document, to be able to easily see who is contributing and how the group is using this resource.
There is a lot more I could say, but if you watch the webinar you will get the hang of it pretty quickly. Experiment, practice, encourage your students to participate. I think you will find this breathing some new energy into the team projects.
Leave a comment